 |
| Eastman's Dry Plates packaging |
The dry plate process first came up in the 1870s, when people were trying to find an alternative for the complicated wet plate process.
Richard Leach Maddox thought of using gelatin and silver bromide emulsion and cover them in silver salts.
Dry plates were also used for portraiture photography a lot, fully establishing it as a genre. (Earlier on, photography was used more to document events.)
In 1878, George Eastman fully introduced dry plates as a convenience as they didn't have to be coated and developed while they were still wet. A company in partnership with Kodak appeared, called Eastman's Dry Plates. They specialized in making dry plates. The camera for dry plates was quite expensive for the time though, priced at $25. They were also quite large and would have been somewhat difficult to carry around. (Though it was possible of course)
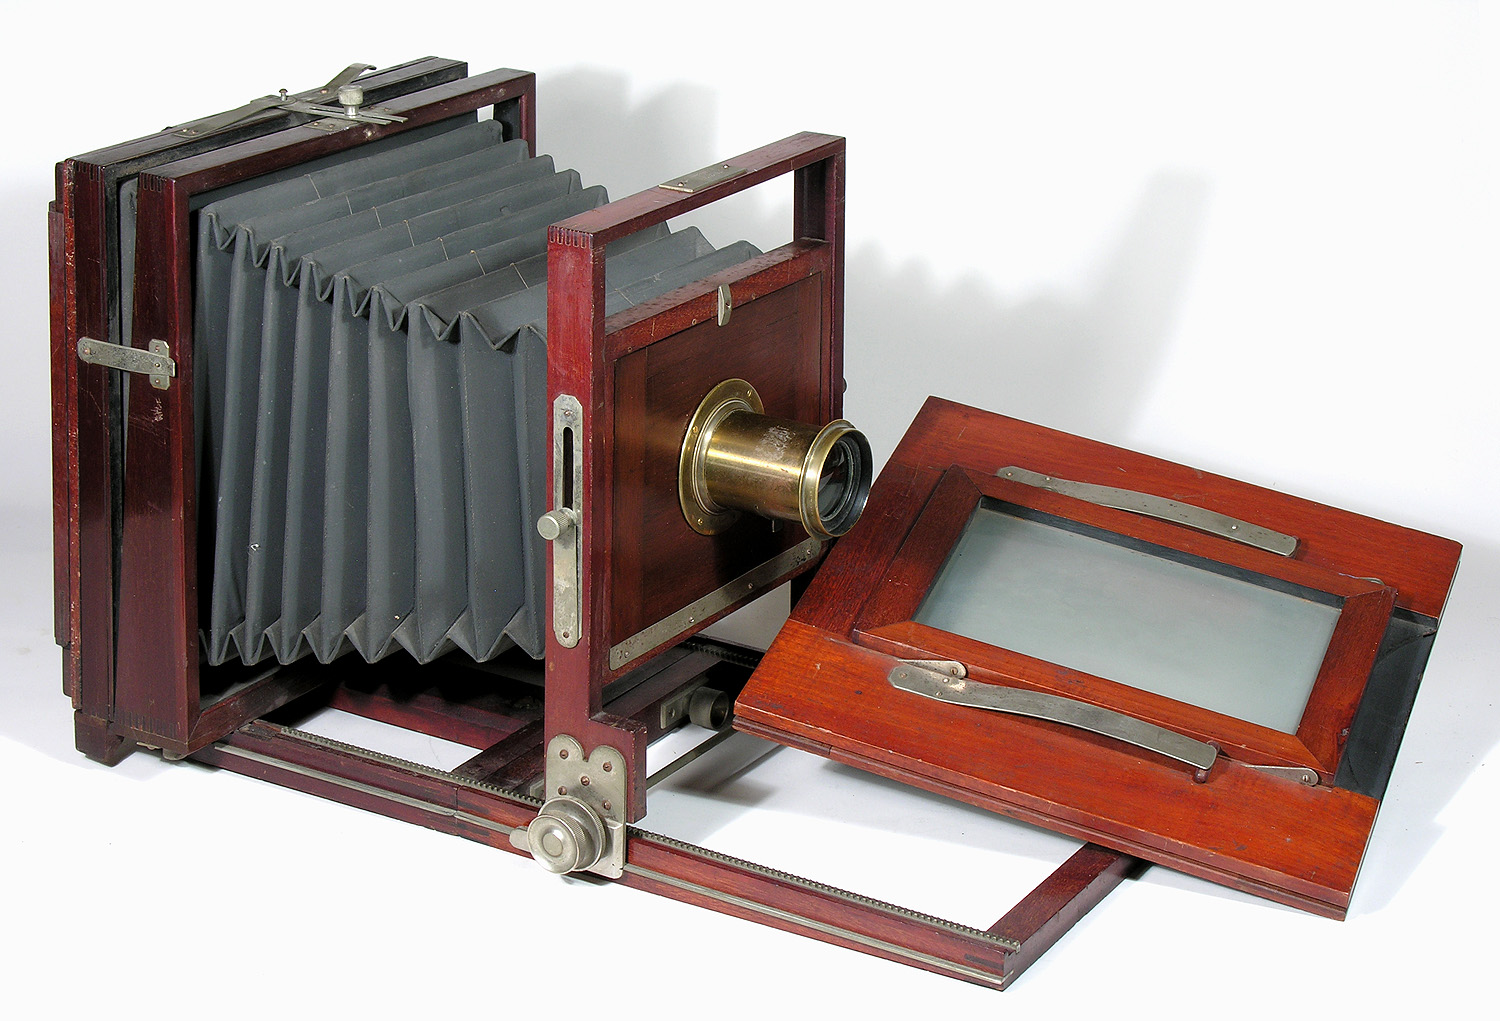 |
| Kodak Camera |
The dry plate process got rid of the need for portable darkrooms when using the camera away from where one might be hard to access. There were many attempts to try to get the pictures to have colour, though colour film didn't exist at the time so some people would choose to 'paint' the images with various kinds of ink.
 |
| Negative (left) and final image (right) |
Creating the images required many different materials and while it was easier than the wet plate process, it was still fairly time consuming by today's standards.
(materials cited from alternativephotography.com, steps cited from blackandwhitefinart.net)
Materials needed
- Large format camera (at least 9x12cm/4x5")
- Glass plate holders
- Thin glass plates
- Unflavoured household gelatin
- Chrome alum (for hardening the gelatin)
- Wetting agent (Kodak Photo-Flo)
- Distilled water
- Liquid Light (or other liquid emulsion)
- Safelight with Kodak OC filter or 1A red filter
- Light proof room/Darkroom
- Measuring spoons
- Light proof box (to dry the plates off)
- Rubber gloves
- Darkroom Thermometer
- Paper developer
- Hardening fixer
- General purpose hardener

1.) Prepare the glass
The first step is to prepare the glass for the images. Cut the glass to fit the holders you have and smooth them, then wash and put to dry.
2.) Prepare the mixture
A.) Pour about 50mL of distilled water and heat to 51°C. Add 1 gram of chrome alum and stir until it's dissolved.
B.) Put 3.5 grams of unflavoured and uncoloured gelatin to 1 cup of distilled water in a glass beaker and let it stand for 15 minutes. Heat to 54ºC until it dissolves. Pour into a clean glass beaker and add items below.
C.) Add 5mL of chrome alum from part A to the heated gelatin and 15mL of photoflo to the mix.
D.) While everything is still warm, pour the entire mixture into a flat bottomed tray that's just slightly larger than the glass plate you intend to use. Remove one glass plate from your tray. It will be hard to see the coating on the glass, but it is there. Place the plate in the holder overnight. Keep it in a warm place with circulating air and low humidity.
3.) Sensitizing the glass (Red Safe Light)
4.) Drying and storage
5.) Exposure
6.) Developing + Processing
Developer: 18-20ºC for 1-2 minutes. Use a white tray and gently rock motion the tray.
Stop: Avoid acidic stop bath. Only 20 seconds of this is needed.
Hardening Fixer: 1 cap full of hardener for 10 minutes. A black tray may make it easier.
Wash: Running tap water for 2 minutes.
Cleaning: Use Hypo Cleaning Agent for 4 minutes and rock the tray again.
Wash: Wash again with clean tap water for 10 minutes.
Drying: Keep it on a paper towel for another 10 minutes then move it to a drying rack. Keep in a dry and warm area with a fan blowing.
Some dry plate images:


 |
| Negative |
 |
Great work! Really impressed.
ReplyDelete